Warcry, to put it lightly, is a delightful tactical skirmish game, with plenty of subtleties and nuances under the hood.
Despite the slimmer ruleset than Age of Sigmar, Warcry comes with all kinds of tactical depth and neat tricks that players can pull off on the tabletop when they get a handle on their warband and the general rules.
That said, it often takes a few games (or more than a few, such as the case may be) before new players get into the full swing of things – especially those coming from a non-wargaming background.
So, in our effort to help newer players get over any potential early game slumps, we compiled 10 tips, strategies, and tactics that can help them get on their feet (and maybe become a bit more competitive) faster!
1 – Deployments have to be roughly equal in size, not power.
Let’s start with something near the beginning of Warcry sessions – deployments!
While this is probably not the most mind blowing tip out there, it’s actually come up in conversation twice with friends who were newer players to the game.
In both cases, they were under the impression that every deployment had to be not only roughly equal in number of units but also cost!
That explains why it took them so long to figure out their deployments…
In the grand scheme of things, this might be a minor footnote in how you prepare your initial deployments, but it can make a major difference depending on what you’re hoping to achieve on the battlefield.
For instance, it is a sensible choice to spread your powerful units around so that your Hammer, Dagger, and Shield each enter the battlefield with a fighting chance.
However, sometimes it can be pretty advantageous to create a strong arm to your whole warband even if one deployment is a little weak.
For instance, why not pair up your Fomoroid Crusher (265 points) with your Blazing Lord (200 points)?
So what if it’s roughly half your total warband in one deployment – wouldn’t the two of them be happier together, especially as the Blazing Lord‘s Triple be better suited to pair with your heaviest hitter?

2 – Make the most of Battle Rounds 1+2 when it comes to positioning and snagging early Victory Points.
Most games of Warcry have more or less two halves to them – the early rounds, where we get into position, and the later rounds, where we pummel the hell out of each other.
In other words, in Battle Rounds 3+4, there’s a good chance most of your actions will be tied up in combat with enemy pieces.
This makes it crucial that you try and sneak in a couple of early Victory Points in rounds 1+2 wherever possible while you still have room to maneuver.
Having that early point advantage gives you breathing room for the combat heavy rounds and forces your opponent to being the one who has to play catchup the rest of the match.
I’ve played more than my fair share of games where I was the only Warband to claim any Victory Points on Battle Round 1 and I basically won the game by a single point or two because of it.
Of course, this can be tricky if you have a slow Warband, such as a chaff heavy Ossiarch Bonereapers or Soulblight Gravelords warband.
If you don’t have any units who can buff them on their early turns, you’re really going to want to make sure you get these fellows moving as soon and as far as possible, or they’ll never make it to the objectives in time.
This is also a reason why it’s good to have one or two really quick units in your Warband, precisely for those early or late game objective steals. And remember: even if you don’t have fast units in your main list, there are always Thralls you may be able to fill in for that role.
3 – When in the thick of combat, go for targets who haven’t activated yet over ones who have.
Here’s a common scenario in Warcry: you and your opponent have one or more models in engagement at the start of a turn (within 1″ from each other).
Your opponent goes first, they wail into your unit, but fail to remove them from the board – they simply didn’t do enough damage.
On your activation, you feel an immediate urged to activate the unit who was just beaten up and hit them back. It’s only natural, right?
Well, as appealing as vengeance might be, it’s better to hold up and assess your options.
Too often we simply want to hit back at whoever picked on us and in the process we miss out on better opportunities while we’re seeing red.
Consider instead if there are other units in the same engagement who haven’t gone yet. If possible, try to remove them from the board by dealing damage to the, before they also gang up on your unit and finish him off.
Other times, if it was just one model versus one model, and nothing else is threatening your wounded piece any more that battle round, look around the board and find a different, more pressing fight.
You can always come back to it later, but use your activation to your advantage and see if you can finish off any pieces elsewhere first.
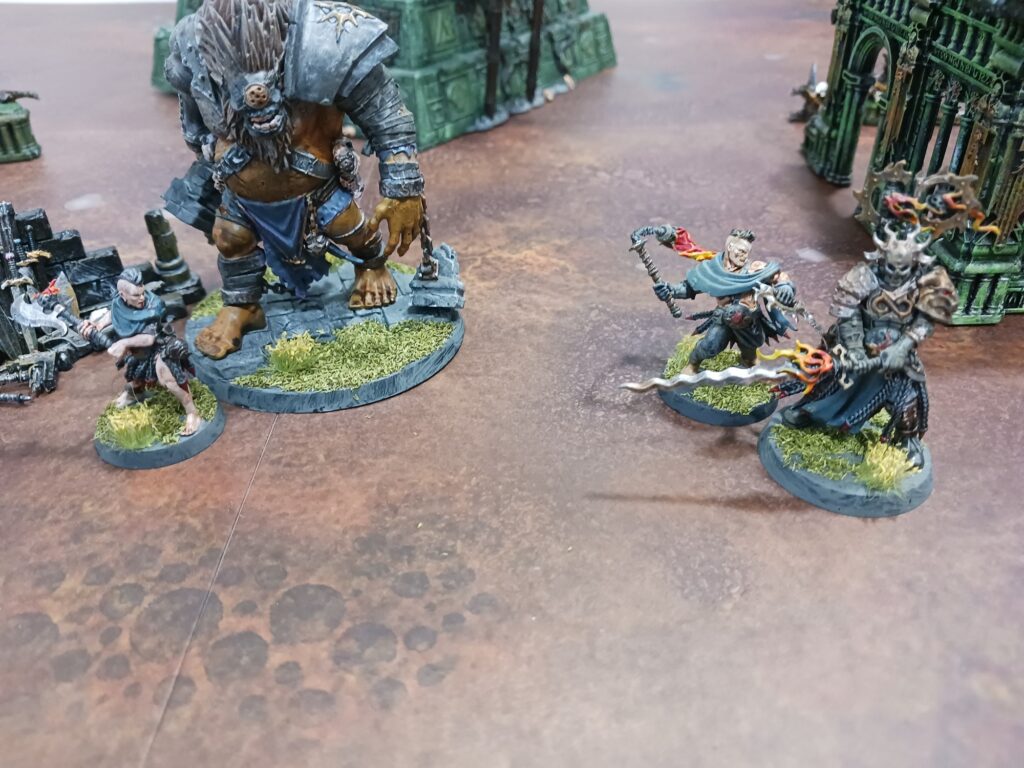
4 – When facing heavies, tie them up with chaff or avoid them altogether
Sometimes you’ll go up against an opponent who fields a serious champion on the table. You know the models – big baddies like the Ogor Breacher, Megaboss, or Fomoroid Crusher to name a few with both big health and big damage.
However, newer players I’ve met have often seen these big pieces as either a challenge they have to overcome, or as a necessary evil to remove from the board.
Realistically, it’s often better to avoid them altogether.
For instance, there’s no point sending a few of your 100-200 point unit against them, especially if they can get removed after a single attack from the enemy model.
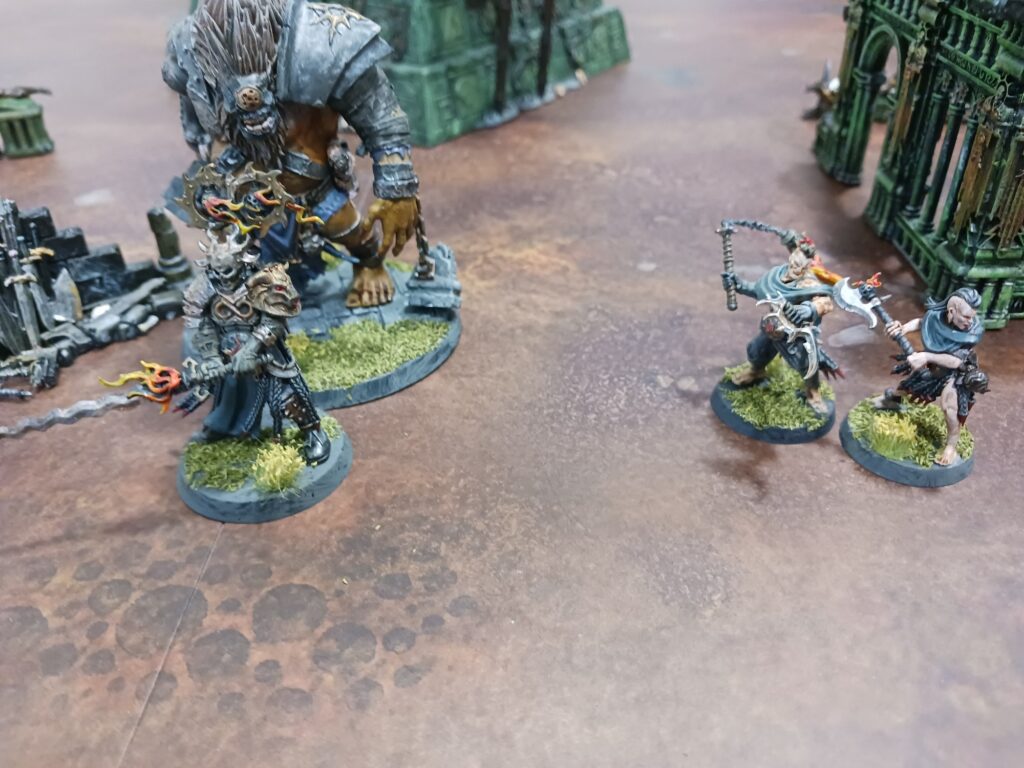
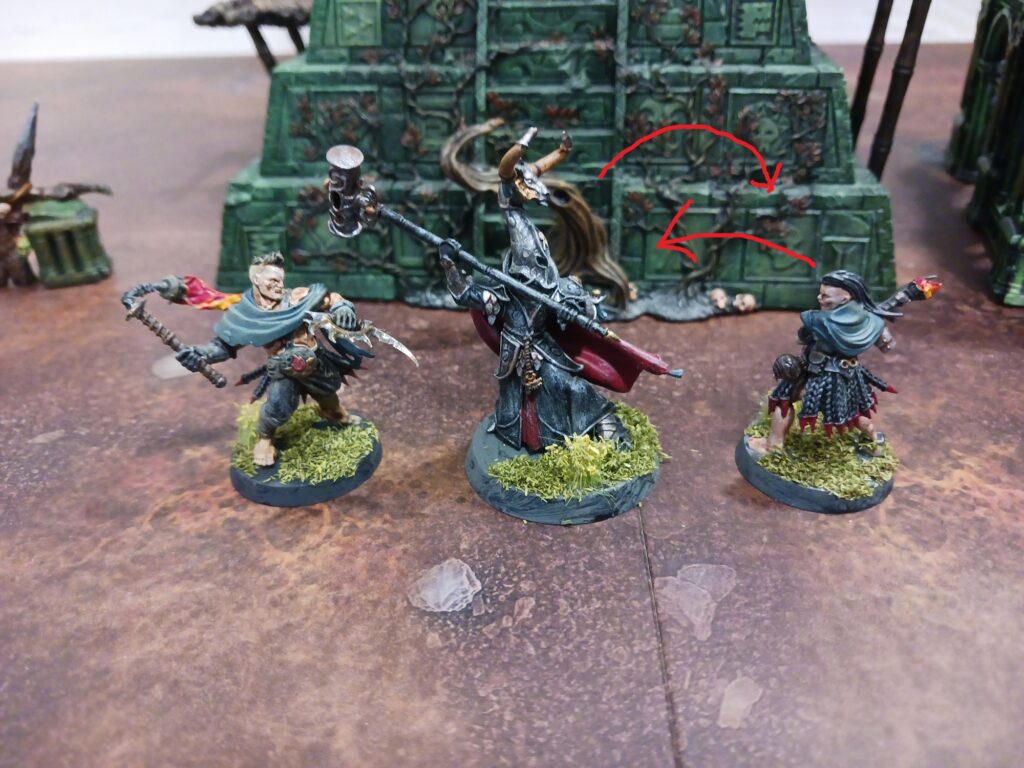
Take for example this scenario without a mid-tier unit like the Brazen Champion

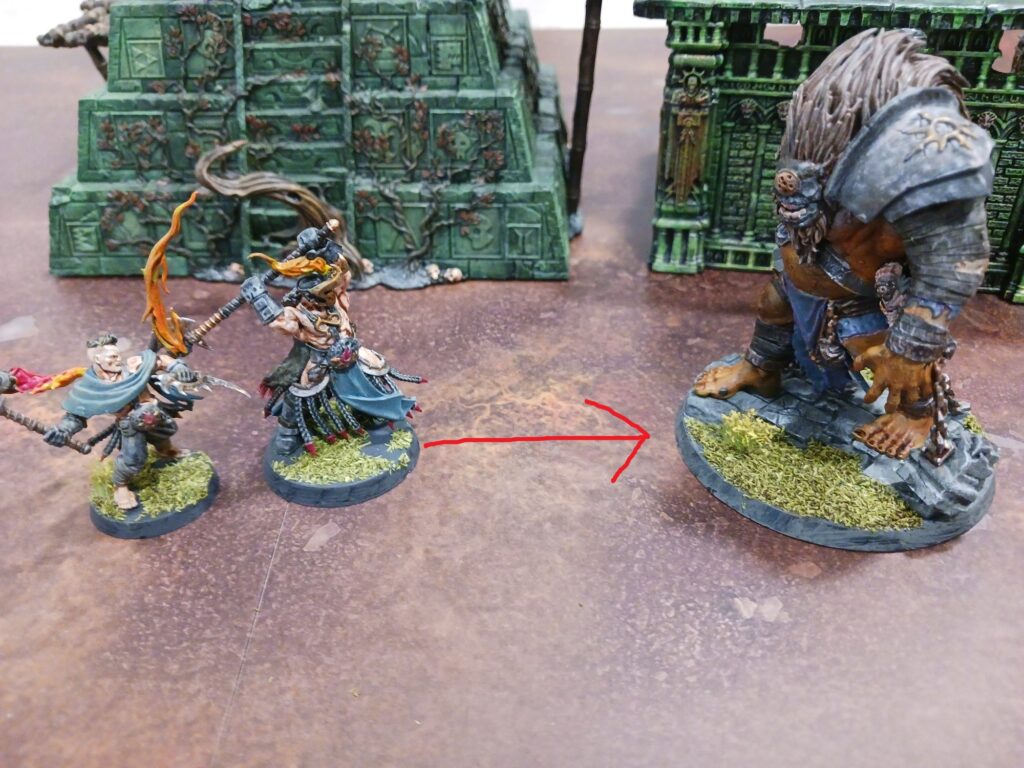
Okay, so running into 1″ is generally a bad idea for a unit with 2″ range, but even then the Brazen Champion is so outclassed, he’s likely toast either way.
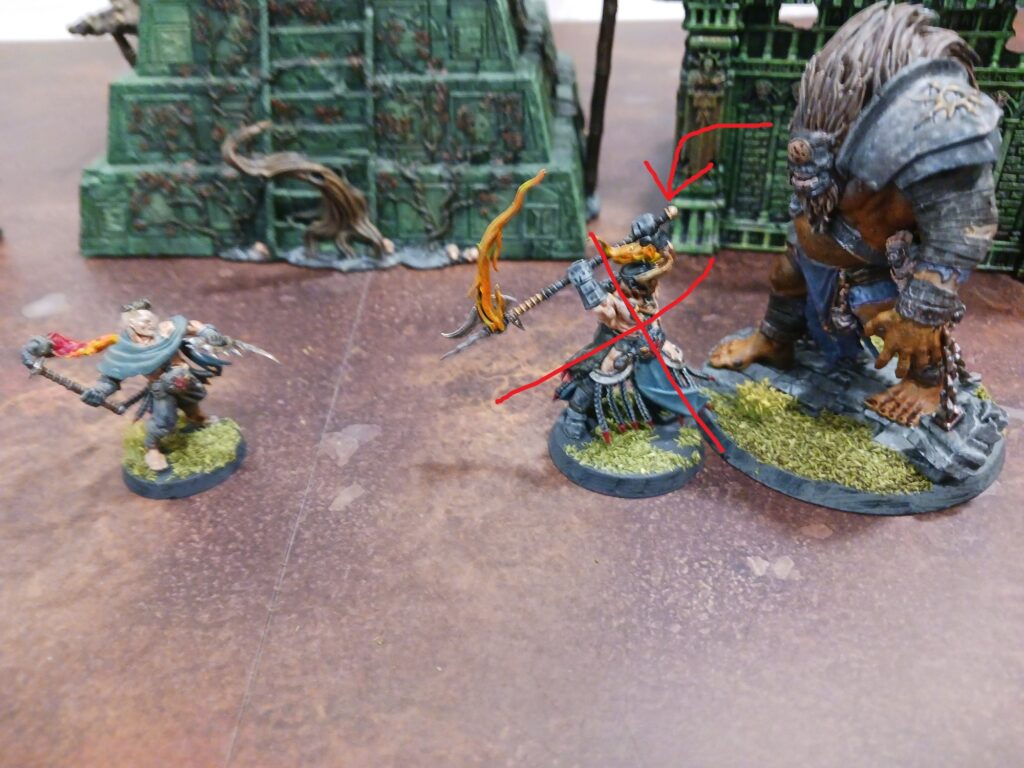
Instead, save your mid-tier pierces for fighting chaff or finishing off other similar pieces.
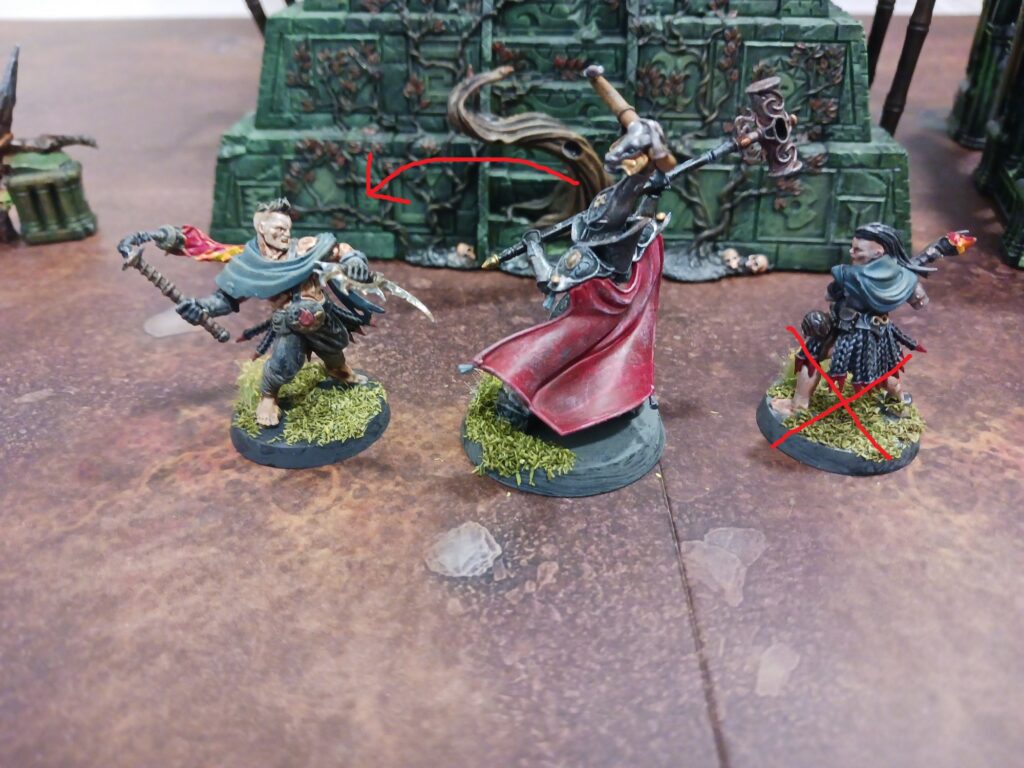
Here’s a better way that engagement could play out.
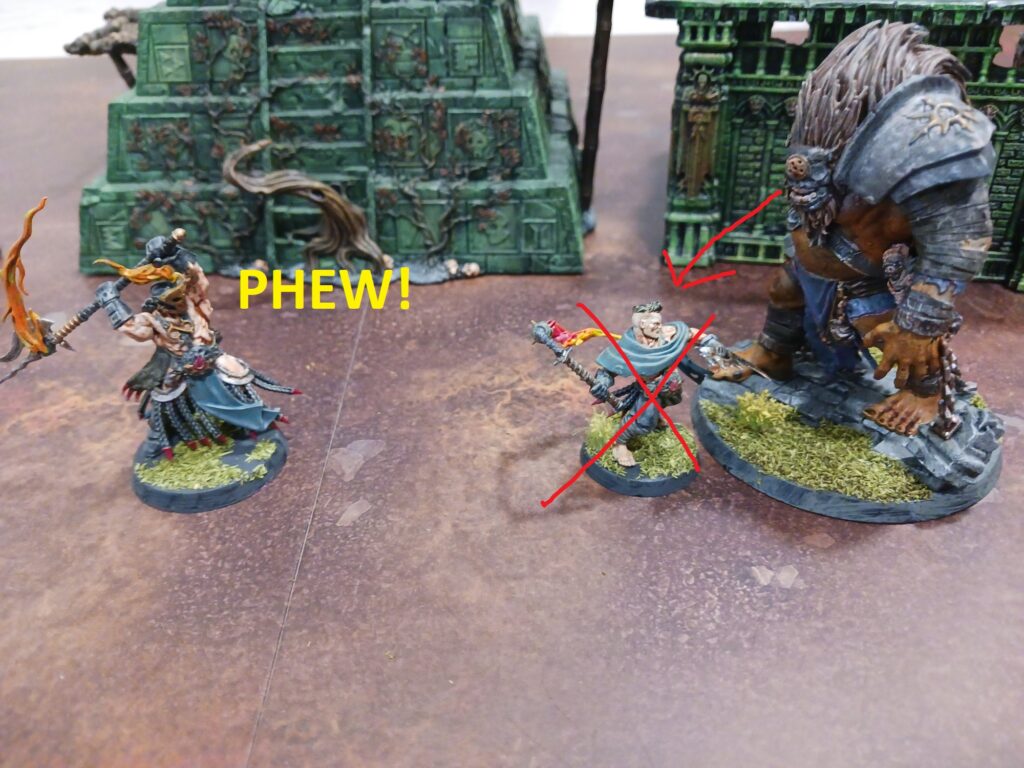
Remember: if you have to fight the big champion, send instead your weakest pieces at them.
For instance, if you are fielding some Hedonites of Slaanesh Sybarites, there’s one great utility for this little guy:

There’s no hope sending them, obviously, but since whatever model faces the big bad boy is toast, feed the beast with something you can afford to lose.
Also, sending tiny 55 point models to tie up 220+ point goliaths is a great tactic for a second reason: attacking something that weak is almost always a waste of your opponent’s precious activations, especially when it lets your bigger fish swim away to safety.
5 – Strategically use wait actions to force your opponent to act first (and do nothing productive).
In Warcry, there are essentially 4 actions a unit can take on their activation: attack, move, disengage, or wait.
Waits are the least used and probably most misunderstood.
Yes, they exist so you can end your turn when you only had to take one activation and nothing else. But more importantly, as a unit can wait twice, it effectively doubles the amount of activations you can take.

The reason why this is important is that sometimes you either want your opponent to make the first move, or maybe make the first three or four moves, before you spring your plan into action.
Warband with significantly higher models counts – such as Soulblight Gravelords or Kharadron Overlords can make devastating use of this – especially against a warband with only a few, like any Stormcast Eternals warband like the SCE Thunderstrike or SCE Sacrosanct.
By waiting 3-4 times with chaff, it might force your opponent to use up all their possible moves and activations before you engage. And if they try to counter with waiting of their own, they’ll simply run out before you do.
It’s not necessarily something to do all the time, as you don’t want to have half your warband waiting around in their deployment zone all game. But, if you get into a good position first, it can force your opponent to have to make their move on terms they might not like.
It also helps ensure that if you get the first hit off against an enemy model, there’s less of a chance that they have activations left to hit you back. For that Battle Round, at least.
6 – Rush and Onslaught are often your best friends.
I’ve noticed this with some friends who started Warcry for the first time (or first few times) – they spent plenty of time with their eyes glued to their Warband specific abilities, but completely ignore the universal abilities.
This is a big mistake as some of the most useful (and often used) abilities are shared by every warband.
The two in particular that should get a lot of mileage are Rush and Onslaught. Both abilities cost a double, making it pretty easy to have one or two available every round, and are very straightforward to use.

Let’s start with Rush. This is a critical ability for removing the handicap of slow pieces (3″ move) and helps ensure they can get to the fight in time to make a difference.
Remember: Warcry has only a couple of Battle Rounds in every game, which means a very limited number of activations. The fewer you spend slowly crawling across the board, the more that are left for combat!
Next up is Onslaught.
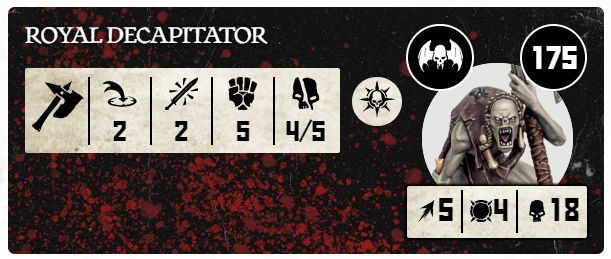
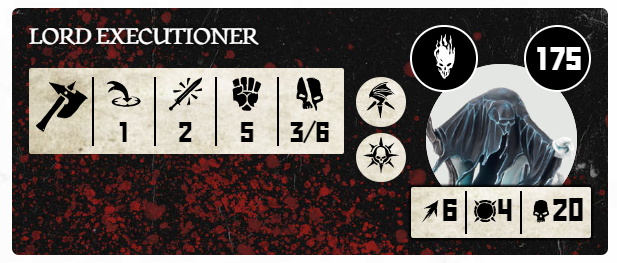
Simply put, Onslaught is amazing – and doubly so for any heavy hitter with a low total of attack dice (like, say a Royal Decapitator or a Lord Executioner).
With units like this, giving them an extra attack dice – per attack activation – can really up their total damage output.
In the case of units with only 2 or 3 attacks, a double effectively gives them a 33-55% increase in total attack dice – and if they’re dealing 4 or more damage a hit, that single extra attack is better than a couple of swings from a 1 damage unit.
7 – Save 1-2 Wild Dice to seize the advantage when you need it (such as Battle Rounds 3 or 4).
As tempting as it might be to spend ’em all when we got ’em, it’s worth saving 1-2 dice for the 3rd or final Battle Round to try and seize the initiative.
The reason for this is that rounds 1+2 are often about movement, getting into position, and setting up, more than all out combat. In those rounds, going first can be useful but it’s not as critical as it often is in the final two rounds.
For instance, in rounds 3 + 4, there’s a good chance you and your opponent are going to have multiple models locked up in combat.
Going first and being able to remove an enemy model before they do the same to you can make a major difference – especially if you start off at a disadvantage.
And the same is true for the reverse – if you start off in a strong position, going first can help solidify your lead by further weakened your opponent (and not risk being brought down to equal footing from losing your best unit by virtue of not going first).
8 – Don’t fear combat, nor losing a few pieces either.
Losing models sucks, but that’s part of the game.
Unfortunately, and this is sometimes pretty funny, I’ve seen newer players clump all their models together in these protective bubbles that move around the board watching each other’s back, and having all sorts of Mexican Standoffs with the opposing player (who might be doing the same thing).
It seems to me that a lot of newer players are sometimes terrified about engaging in melee because they simply can’t image the consequences of losing a single precious piece.
This is even the case when their piece is a veritable goliath who would crush everything else one-on-one.
In cases like this, always remember to check the stats of your unit versus those of the enemy. If your piece has twice the toughness and triple the hit points, you probably have nothing to worry about.
And heck, even if they’re even and you have a strong chance of taking the opponent out, it’s usually worth doing it. Part of the thrill is about taking risks and watching how they play out.
And if you end up being too cautious, you could be in for a world of trouble if your opponent is not.
That said, you don’t need to needlessly throw units into the fire – unless you’re specifically stalling for time or holding the line. But expect to end any game of Warcry with fewer pieces on the board than when you started out.
9 – Don’t hold out for Quads (but don’t ignore them either).
Quad abilities are meant to be among the best in the game – hence why it’s relatively rare to end up with them either naturally (from your six ability dice) or even building them with your wild dice (adding one to a triple).
Because of this, it’s probably best not to factor these abilities very much – if at all – into your overall strategy going into a match. Especially considering that they might never show up!
Take my own luck with rolling these – I play Warcry pretty regularly and was even in a tournament recently, and I haven’t rolled a natural Quad more than once in 2 months.
That’s probably been about 16-20 games, and with 3-4 battle rounds each, I’m batting close to a 1-2% chance on average of getting a natural quad. Not great.

Okay, so that might be worst-case scenario, or vengeance from the dice gods for all the years of lovely rolls they’ve given me, but it’s still the least likely thing you will roll. Even rolling triples naturally is less common than you might think.
As such, think of any Quad ability – whether it’s Rampage or something else as a “nice to have” and not a “must have in order to win.”

When they do come up, don’t look the gift horse in the mouth – especially on the later turns. Rolling and receiving a Quad to deliver a rampage right at the start of Battle Round 3 or 4 can really make your evening.
10 – Play the objectives (if you want to win).
I was torn between placing this tip either at the front or the end of this post, but I figure it’s a sensible way to cap things off.
Warcry is a combat-focused game that involves removing enemy pieces from the board, but winning is often about much more than that.
Specifically, once you’ve played a few games, you’ll probably start to realize that the majority of the missions and objectives in the core rulebook, Rumble Pack, and other mission packs are not focused on removing enemy pieces – but more often than not, about claiming objectives by piling the most bodies onto them or by securing treasure tokens and keeping the carrier safe.
While I don’t have the numbers to back this up, I’m fairly certain that the majority of the missions out there are not focused on removing enemy pieces. That means if your warband is purely optimized for combat with no maneuverability or other tricks up your sleeve, there’s a good chance you’ll get outplayed most of the time.
That said, I know that there are plenty of players who just want to smash stuff, regardless if it’s the game objective or not. And on the flip side, if you’re in it to win it, there’s nothing more satisfying that coming out with a victory even after you scarificed most of your Warband in the process.
Further Reading For New Players
We’ve put together some other content recently that might be useful if you’re still new to the game. Here are some suggested follow-up pieces:
- Listbuilding suggestions for SCE Thunderstrike, one of the most beginner friendly factions in the game.
- A guide to understanding where and what to buy for Thunderstrike (especially on the cheap).
- Some tournament lists if you want to see what really efficient Warbands might look like.